Creating a Follow-up
A follow-up is the file that holds everything you exchange with a beneficiary. Creating one takes a few seconds, and you can schedule the first appointment in the same form.
Open the form
Click + New Follow-up in the header. The button is available from every screen.
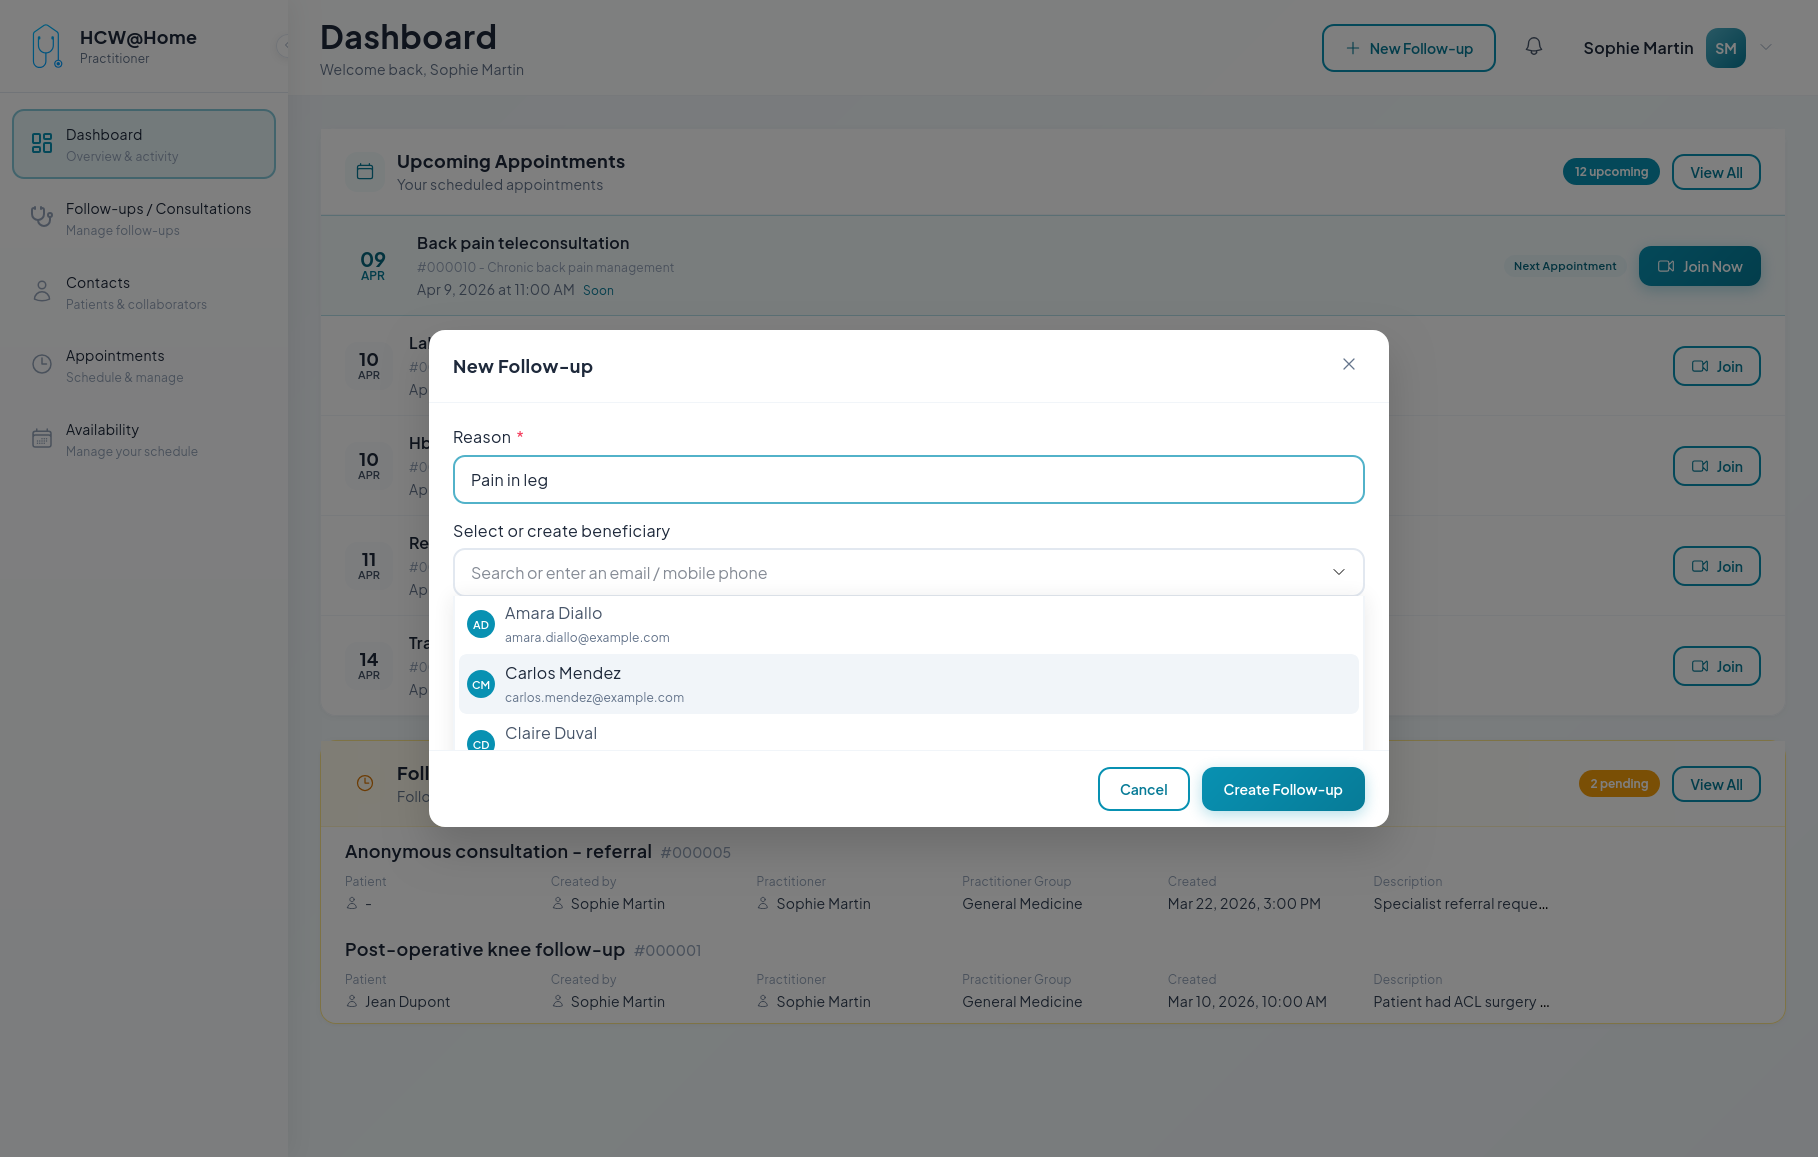
Step 1 — Describe the follow-up
| Field | Notes |
|---|---|
| Reason (required) | Short title identifying the file, e.g. Post-operative knee follow-up. It is visible to the beneficiary. |
| Select or create beneficiary | Who the follow-up is about. Optional — an anonymous follow-up is perfectly valid. |
The contact field
The beneficiary field is a single search box that both finds people and invites new ones. Type a name, an email address or a mobile number and the drop-down offers what applies:
| Entry | Result |
|---|---|
| An existing contact, tagged Account | Uses their account and their history |
| Invite <value> | Creates a temporary guest and sends them an access link by email, SMS or WhatsApp, depending on what you typed and on the channels your administrator enabled |
| Invite <value> with a link | Creates a guest but sends nothing — you copy the link and pass it on yourself |
| Create contact <value> | Opens the full contact form to create a permanent account |
Once someone is picked, a card shows their name and a tag — Existing account, Temporary guest or Link only — plus how they will be reached. Change swaps them for someone else.
For a guest, a Contact details block can be unfolded to add a first name, a last name, a preferred language and a timezone. All optional, but the language and the timezone are what localise their invitation and their reminders.
You do not have to use a real name
Any identifier you can recognise works — a case number, initials, a reference. Nothing forces you to enter identifying information, and the beneficiary can even be left empty.
Step 2 — Schedule the consultation
Tick Schedule the consultation to reveal the appointment form. Leave it unticked to create the file now and schedule later.
- Appointment Type — Video for a teleconsultation, In Person for a physical visit. Video appointments get a call room and a join link; in-person ones only produce reminders.
- Summary — optional, what the meeting is about.
- Date and Time — or click Now to start immediately.
- Expected End Date / Time — optional. Without it the appointment lasts the default duration set by your administrator (30 minutes out of the box). The expected end also defines how long participants can rejoin the call.
Step 3 — Add the participants
You are added automatically, and so is the beneficiary. Click Add participant for everyone else — a colleague, a specialist, an interpreter, a relative. There is no limit.
The modal uses the same contact field as above: search for a colleague, or type an email address or a mobile number to invite a guest.
It adds one checkbox: Can see the consultation messages. Tick it to give the participant access to the follow-up chat and shared documents, before, during and after the appointment. Leave it unticked for someone who should only attend the call.
Click + Add this participant to confirm, and repeat as needed.
Enable the chat unless confidentiality says otherwise
Without Can see the consultation messages, the participant cannot exchange anything before the call, cannot receive documents, and cannot use the chat during the call.
Step 4 — Permissions and access
Tick Permission and access to reveal:
- Responsible Practitioner — assign the follow-up to a colleague instead of yourself
- Practitioner group / shared queue — attach it to a group, so every member can open it or assign it to themselves. Without a practitioner and without a group, you are the only one who can access the file.
- Do not allow the patient to interact with the chat — the beneficiary can still read the follow-up, but cannot send messages
Create
Click Create Follow-up. Invitations go out immediately for participants contacted by email, SMS or WhatsApp. For link only participants, open the follow-up and copy their personal link — see Managing a Follow-up.
The full form
Edit on an existing follow-up opens the same information as a three-step form — Details, Assignment, Schedule — with two extra fields:
- Description — context for the follow-up, visible to the patient
- Internal notes — clinical notes visible to practitioners only, never shown to the patient
Your administrator may also have defined custom fields, which appear at the end of the details step.